 |
| You can see why the entry needed some privacy! |
Entry Window Film
So, after some serious searching and saving, we bought a home in the Bay Area. Despite being in all its 1980's glory, the house somehow came with zero window coverings. So, upon moving in that was project # 1. I really liked the look of etched glass but it was way too expensive and our HOA wouldn't have allowed it anyways.
So, I decided on
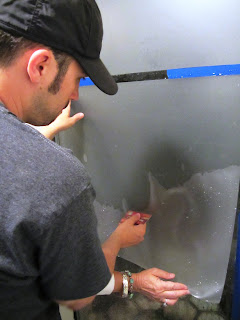
window film. We bought two at Home Depot for about $60. It still let the light in but provided the privacy I wanted. It came in one long piece which was actually short for our window. So, we decided to cut into three pieces and give an inch of space around each one. First step was to measure and cut three equal parts.
 |
| Preparing to cut into three pieces |
We lined the edges of the window with painter's tape to give us a clean line. Then we just needed a spray bottle filled with water and a credit card. You separate the paper from the window film like you're peeling off a sticker. Except the one side isn't sticky until it's wet. Then spray the window liberally and line up the film with the blue painter's tape. The credit card then comes in handy for pushing out all the air bubbles to the sides.
 |
| Our tools: painter's tape, a spray bottle and credit card. And measuring tape of course! |
 |
| Making sure it was straight. We trimmed off a little bit. |
 |
| Side one is complete! |
On the other side, we decided to repeat the same steps except add our house numbers at the top. I borrowed my sister's Cricut for the numbers and found a platter that worked to trace an oval for the numbers. It was actually pretty simple. I just programmed in the house numbers and ran an extra (trimmed off) piece of the window film (with the paper backing still on) through the Cricut. It cut in deep enough for the numbers and I was able to peel them away one by one. Then it was just a matter of putting them on straight using painter's tape again as a guide.
 |
| Dinner platter made the ideal shape. |
 |
| I printed them backwards so that they would look right from the outside of the house. |
 |
| Here's a view from the outside of the house. |
And then the project was complete!
 |
| You can kind of see someone at night if they're right next to the door. |
A fun surprise occurred that night when we turned on the outdoor entry light. The house numbers shone right through onto our wall with a cool effect!


I have been considering reupholstering some dining room chairs. Do you have any experience in this task? If so, can you please do a blog post on this subject? Also, would you recommend taking on this challenge? Again, I LOVE your blog. Please keep the posts coming! :)
ReplyDeleteAwesome! It was a wise decision to consider window film versus etched glass, because aside from the cost, it is also easy to install and remove if you want to it be more personalized. It also does well in providing a private feel to your room.
ReplyDeleteGreg Arnett